When we signed on the dotted line and acquired the key to our new home in 2005—a new house in a new development—the rock-studded clay and steep slopes of our lot offered a tabula rasa. The woods beyond, a non-tidal wetland protected by the state Department of Natural Resources, would ring with birdsong as soon as the tumult of construction died down. We envisioned a day when trees, shrubs and perennial flowers that we would artfully install, would be the glory of the neighborhood and surround us with beauty year round.
Well, the redbud I nurtured from a twig is now a graceful form that is lovely in winter, dense with pink flowers in the spring and covered with heart-shaped leaves that shift from summer green to autumn gold. The rock gardens in the upper terraces are practically overgrown with ajuga, columbine, various succulents, and grape hyacinth. Moss phlox makes giant splashes of pinks, lavender and white in spring and is attractive in its feathery green the rest of the time. We get a fair number of compliments from neighbors, visitors, and the UPS guy, so in general I would say we are well on the way to achieving that vision.
Except in the Lower Forty.
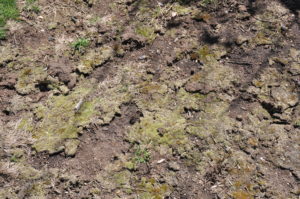
The Lower Forty is an oblong space below the retaining wall that slopes from about 15 feet at its highest point to ground level about halfway through the backyard. This flat ground is mostly riparian buffer between the wall and the wetlands. Despite our plans—and an agreement with the builder—that the area was to be sown with wildflowers by us, the new homeowners, it was covered with cheap lawn mix by them and given a blanket of straw lousy with undesirable seeds. That was followed by several days of rain. In no time at all, the Lower Forty was a morass of weeds.
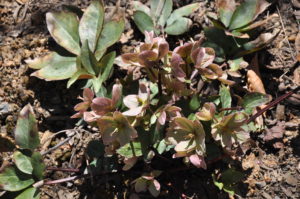
Conceding that battle if not the whole war to the weeds, I focused my attention on one end and filled it with durable perennials. The deer mowed down the Joe Pye Weed. The foxglove looked lovely for a season then disappeared. The liatris never came up. The bluebells did so-so. The black-eyed Susans turned into deer dinner. There were moments with things looked good—like when I had just planted flowers and mulched around them, but those moments were few.
We decided to try grass again in the section not given over to flowers and chose a fescue that we hoped would grow longish and lush and crowd out everything else. We paid Landscape Guy to bring in a load of dirt—a very cool thing to watch as the soil was blown in through a giant hose—and spray it with a coating of seed. The fescue sprouted quickly and grew well. The Lower Forty looked wonderful and after a month or two we even enjoyed a few games of croquet.
Each year since then it has looked less and less good. Weeds moved in, despite ongoing eradication and the annual seed and feed. Now it simply looks like hell.
Before signing the contract for a new year of mowing and maintenance, I invited Landscape Guy to take a look at it with me. We agreed that it looked pathetic and that it might make more sense to reduce the amount of maintenance scheduled and set our sights on something other than the creation of a meadow.
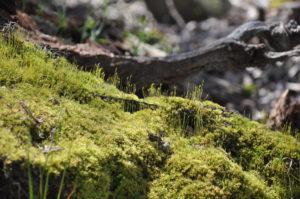
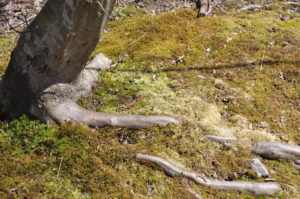
I pointed out the places where moss was established on naked ground. What did he think of encouraging moss, with the goal of a velvet carpet throughout? Well, Landscape Guy mused, it might work. The environment was damp enough, probably shaded enough. Okay then, we decided, cut back on mowing, no fertilizer or weed treatments, and I would start spreading moss slop around.
A lot of people spend huge amounts of time and money trying to remove moss from their lawns. I am more interested in removing lawn from my moss. Moss slop is something I learned about from Moss Acres and other websites dedicated to bryophytes.
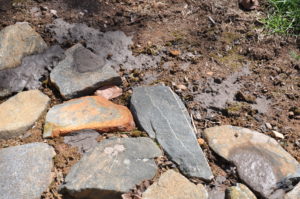
There are two ways to plant moss. You can transplant mats of it the way one might sod a yard with turf grass. Keep the moss wet until it is well established and all should be well. The other way to transplant moss—particularly effective if you want moss on rocks or the interstices of stone pathways—is to spread moss slop.
Moss slop is easy to make.
I collected a bucket of mosses, several different kinds, from our woods. Mosses are particularly abundant this spring and even to my uneducated eye there are at least five or six varieties. I ran chunks of moss and dirt through the blender with enough water to produce a thick mud and then I mixed the mud with low-fat buttermilk.
Buttermilk, apparently, is a perfect fertilizer for mosses, presumably because of its acidic nature and nutritional load. Some people recommend beer—preferably flat beer. Dry skim milk is another suggestion. There is no scientific proof for any of this, just enthusiastic anecdotes.
At any rate I took my slurry of buttermilk, moss and mud and poured it on a bare ground in areas where mosses seem to be moving in. Apparently it is important to keep the slurry damp so it will get a watering can of water at least once a day. In a couple of weeks, I hope, I will see signs that new moss growth is underway. Stay tuned.
Now all this makes me wonder if growing moss wouldn’t be a perfect science project.
Assignment: Determine the best medium for encouraging the growth of moss.
Materials List
- Five or more wide, shallow clay plant pots, baking dishes or trays of identical or similar size
- Potting soil to fill each pot to a level of 1-3 inches (bagged potting soil is clean and will provide the most reliable growing medium.)
- About a quart of each of the following: low-fat buttermilk, lager-type beer and stout-type beer (beer should be opened and allowed to go flat before using)
- Water
- Enough of a single type of live moss so that about one (1) cup can go into each pot. (Don’t complicate things by discovering that different mosses like different fertilizers or grow at different rates.)
- Measuring cup
- Blender
- Watering can, preferably one with a sprinkler element
Pot 1
Shred about 1 cup moss as finely as possible. Mix it with potting soil. Pat it into the container. This pot is your control pot.
Pot 2
Place 1 cup of moss in the blender with 1 quart of water. Blend until moss appears to be well chopped. Pour slurry over soil.
Pots 3, 4 and 5
Repeat instructions for Pot 2, using buttermilk, and the two kinds of beer.
Now:
1. Place all the pots in a cool place away from too much direct sunlight.
2. Water all five pots twice a day, putting the same amount of water on each. The soil should stay moist so start with one cup of water and adjust as needed.
3. Keep a log of all actions, such as watering. Note changes in the pots and watch for moss growth. If the pots are kept outside, then daily temperatures (highs and lows) and precipitation should be noted in the log.
4. Find out which pot does best and let me know. Send pictures. I love pictures.
There are infinite possibilities for variation. Add dried skim milk or commercial plant food to the list of fertilizers. Test different brands of beer. Try to grow moss on pebbles or rocks.
For teachers who are big on interdisciplinary activities: conduct research on bryophytes; draw and photograph your mosses; learn about Japanese gardens; create Bonsai that include mosses; calculate amounts of soil needed to fill a certain number of pots of specific size. I’m sure there’s a lot more that could be added to this unit, but you’re the teacher, you figure it out.
It should make a great display at a Science Fair.
And whatever you discover might help me create that green velvet carpet of moss.

